
Bob Kiaii, MD
Mitral Valve Repair (MVR)

Procedure Overview
The mitral valve repair procedure treats diseases affecting the mitral valve, through which blood from the left atrium enters the left ventricle. If the mitral valve can't be repaired, surgery may be needed to replace the valve. In this procedure, a surgeon removes the mitral valve and replaces it with a mechanical valve, or a valve made from cow, pig or human heart tissue (biological tissue valve).
INDICATIONS:
- Stenosis: When calcium or other deposits build up on the valve, the valve opening become narrowed, inhibiting the flow of blood out of the ventricle.
- Regurgitation: The valve does not close completely, causing the blood to flow
backward into the left ventricle at the end of systole.

Prep & Patient Positioning
Prep
- Femoral arterial access is sometimes obtained when radial artery monitoring is a concern.
Common patient positioning:
- The most common position used for cardiovascular procedures is the supine position. This type of position allows the best possible surgical access to the chest cavity.
- For mitral valve repair, the anterior thorax is exposed with the patient in a supine position.
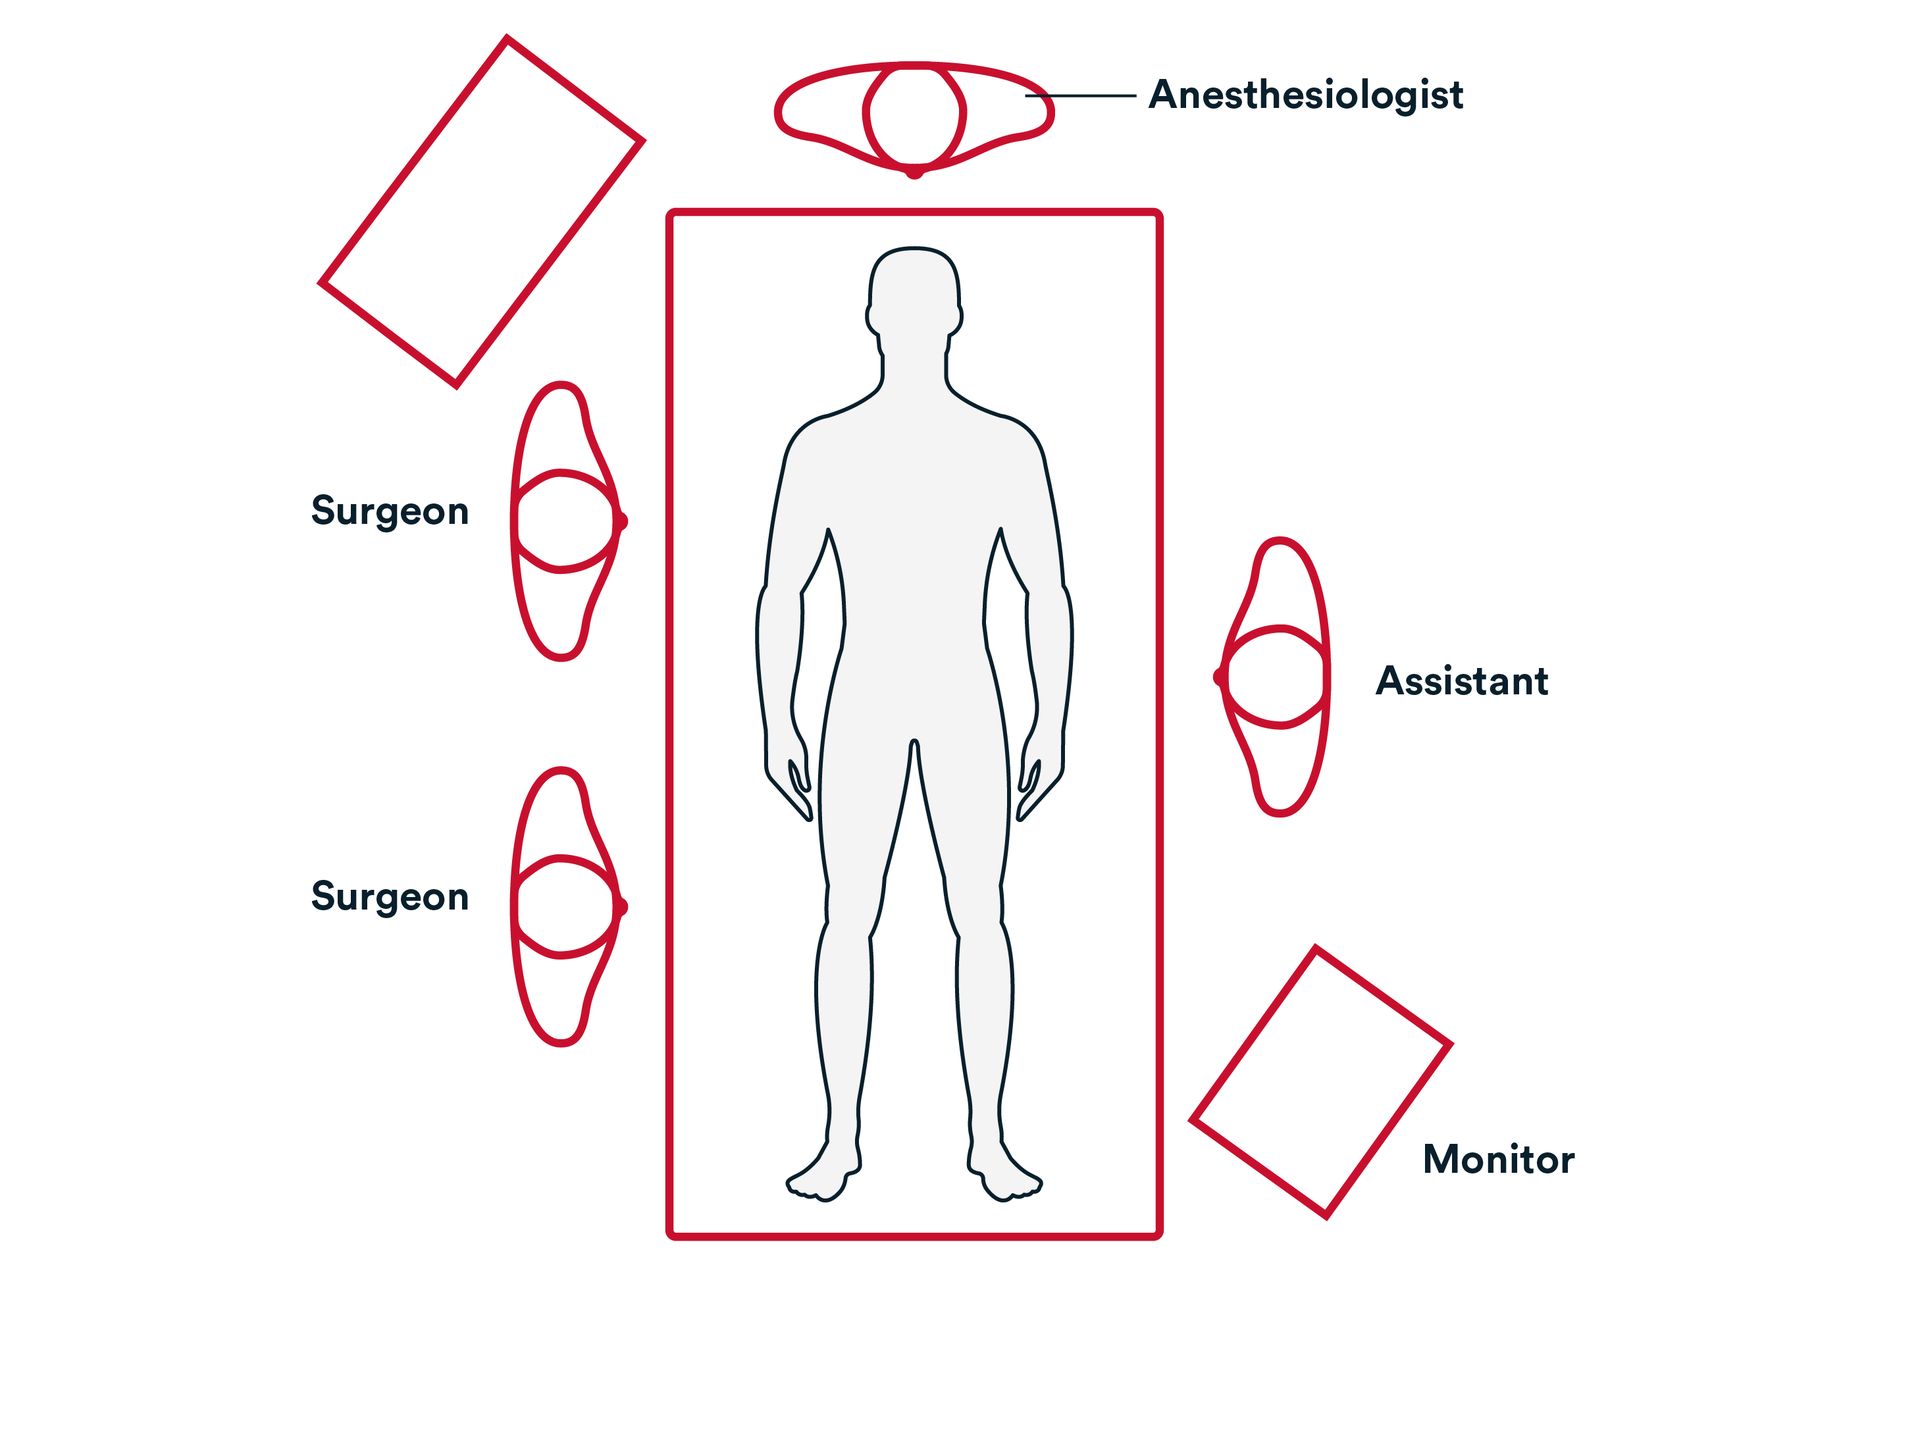
Common room setup
- The surgeon is almost always on the right side of the patient.
- Assistant on the left side.
- Bypass machine is usually close to the patient and can be on either side.
- Monitor that is positioned so the surgeon can see the hemodynamics during the procedure.
- Transesophageal echocardiogram machine is at the head of the patient.
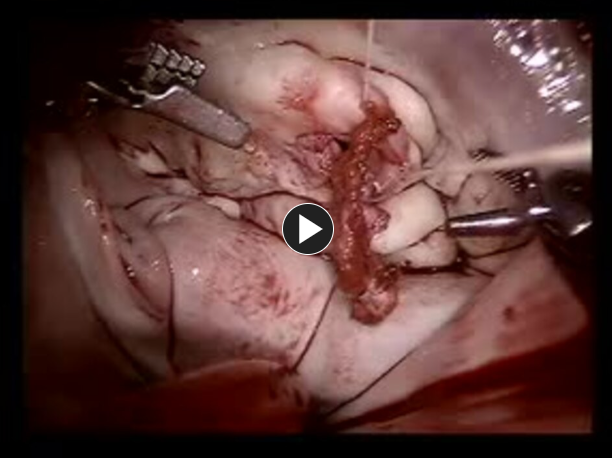
- The valve is inspected, and assessed if suitable for repair.
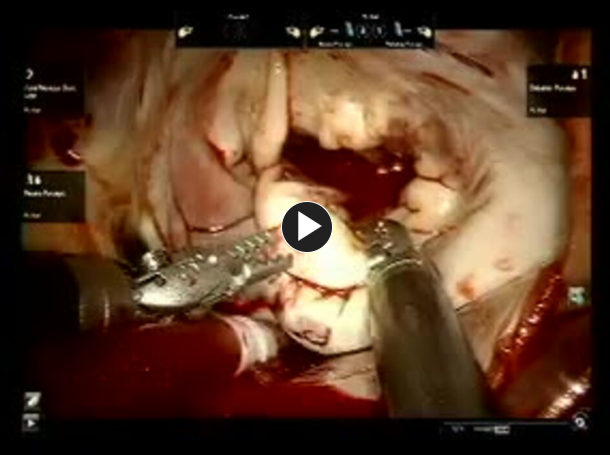
- Inspection of anterior perforation.
- Leaflet testing.
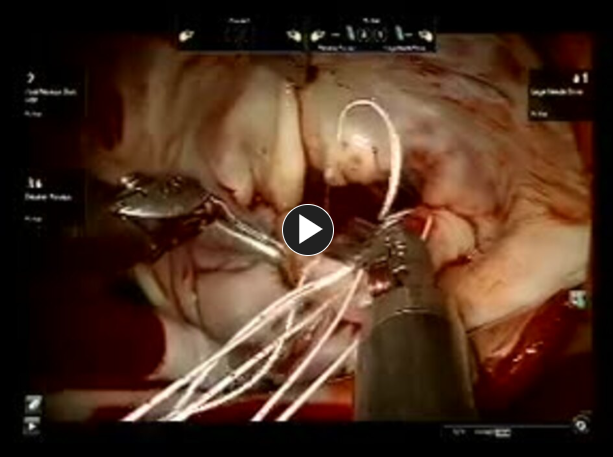
The Valve is repaired by assessment of method of valvuloplasty. This can be completed by either of the approaches:
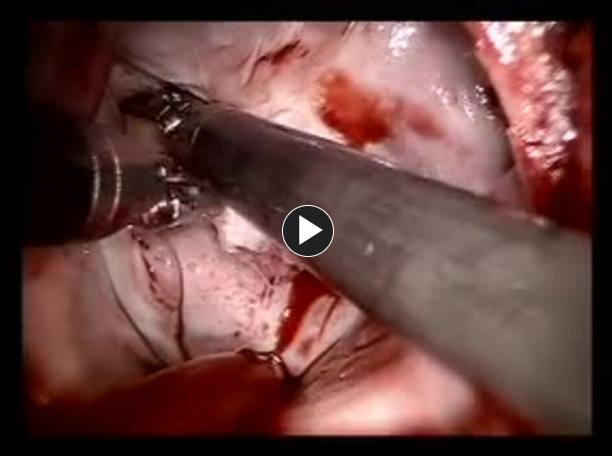
- The leaflet prolapse is repaired using insertion of new Chords.
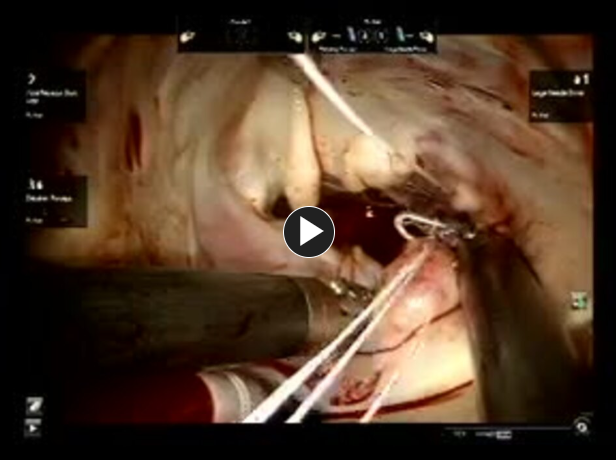
- Insertion of loops onto leaflets part 2.

- Knot tying of loops.
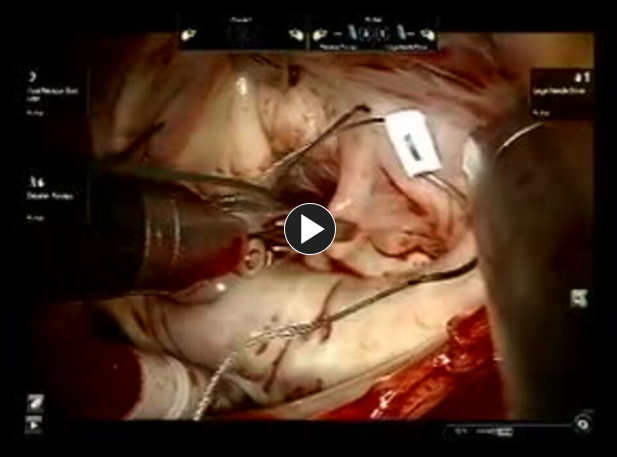
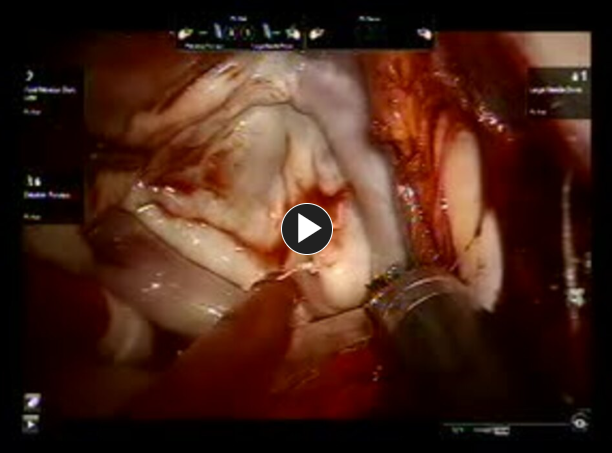
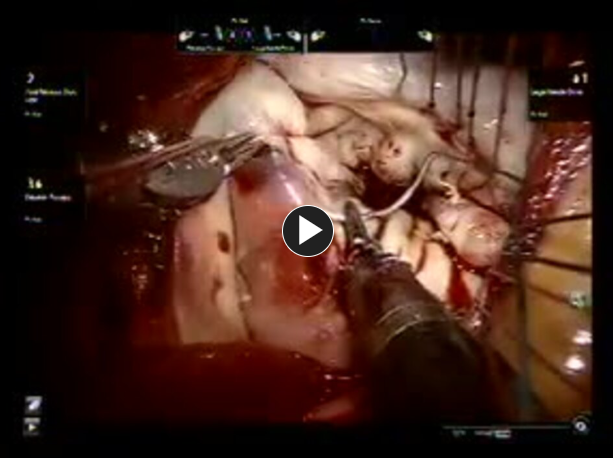
- The leaflet is resected using triangular or quadrangular resection method depending on surgeon’s preference.
- Leaflet resection and suturing.
NOTE: On occasion if there is perforation of leaflet, it can be repaired with pericardial patch repair.
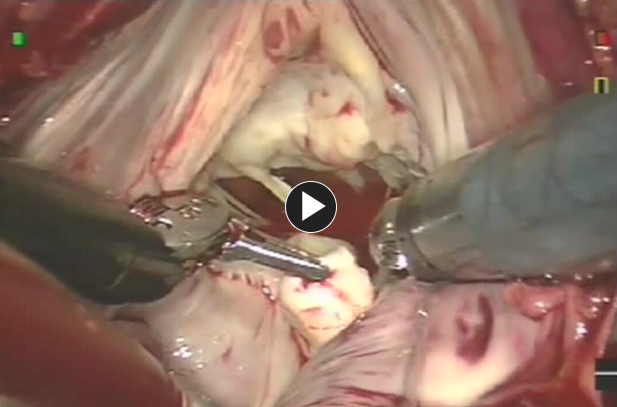
- Insertion of loops onto leaflets part 2.
- Pericardial patch final.

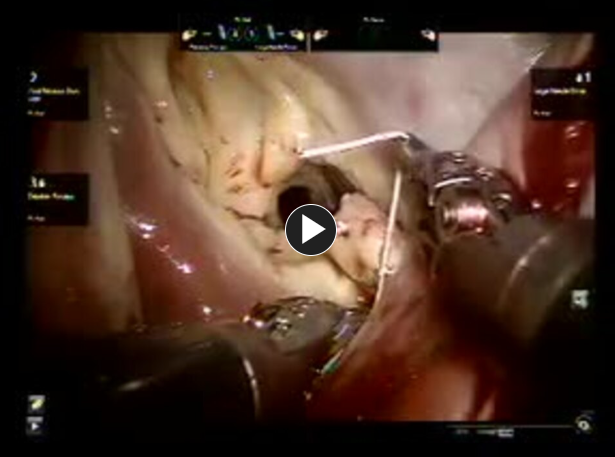
- The Annuloplasty is performed by sizing the anterior leaflet height and/or the distance between triagones with annuloplasty sizers to select the appropriately sized Annuloplasty ring or Band, depending on surgeon’s preference.

- 10 to 14 sutures such as non-pledgeted 2-0 Ethibond Excel™ are then placed around the circumference of the mitral valve annulus in a transverse fashion.
- Valve sutures are tied down circumferentially.
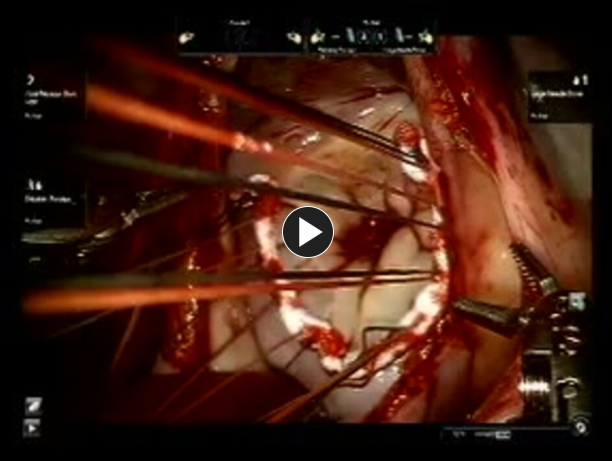
- Knot tying of annuloplasty sutures part 2.

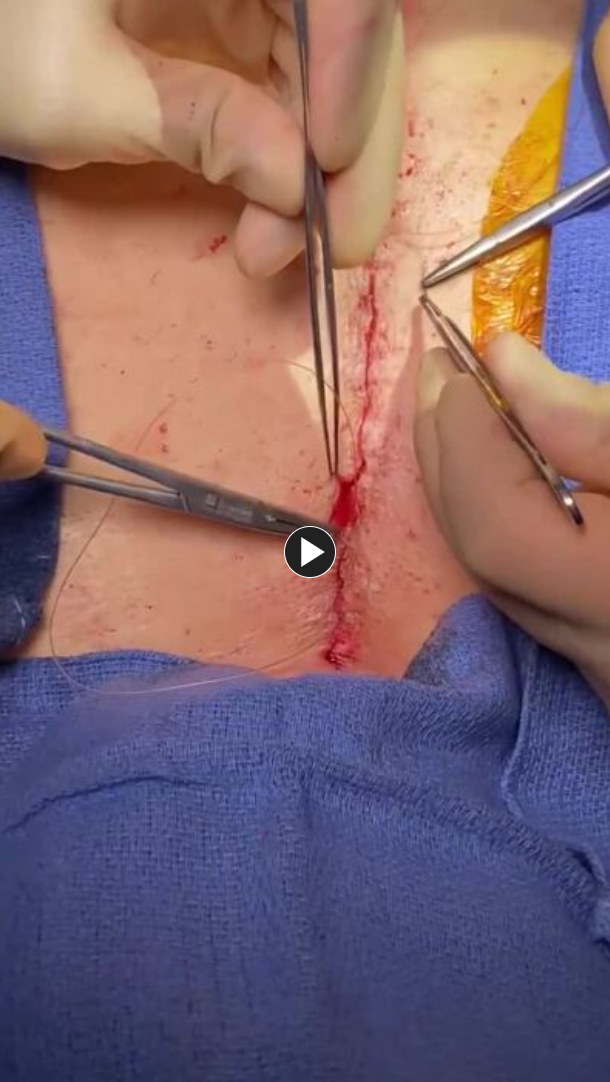
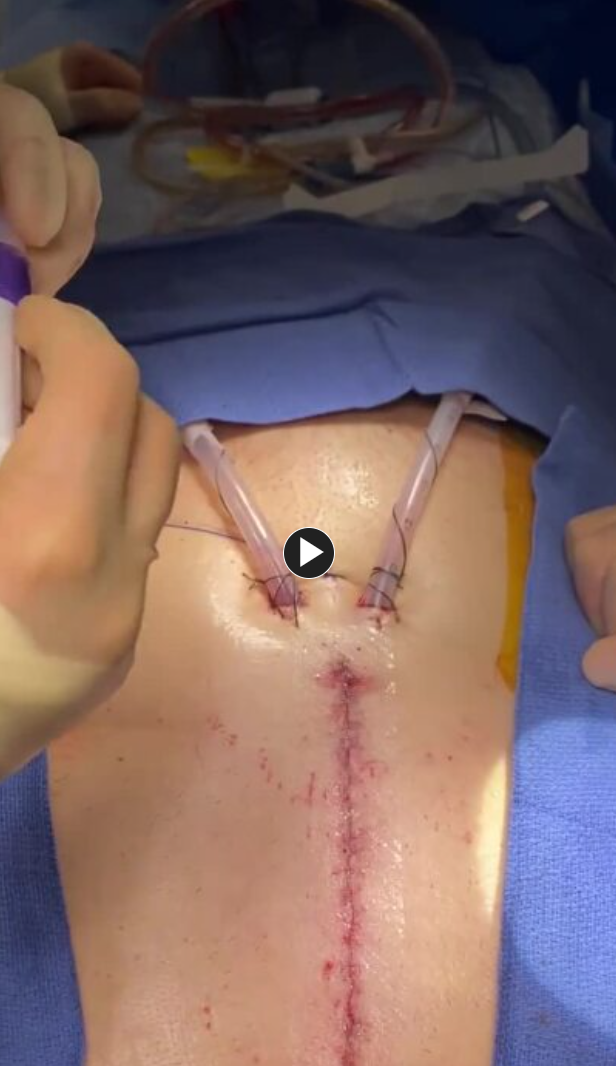
The wounds are closed using synthetic absorbable monofilament, such as Monocryl™ Plus Antibacterial suture, or a knotless tissue control device, such as STRATAFIX™ Knotless Tissue Control Devices, and a topical skin adhesive such as DERMABOND PRINEO™ Skin Closure System or any appropriate dressing.
- STRATAFIX

- Monocryl™ Plus Antibacterial Suture
- DERMABOND PRINEO
Additional resources

Access our on-demand Cardiovascular video library
Looking for more? Explore procedural videos and webinars from global experts

SuturED
SuturED consists of e-modules covering topics such as suturing techniques and the science of tissue management